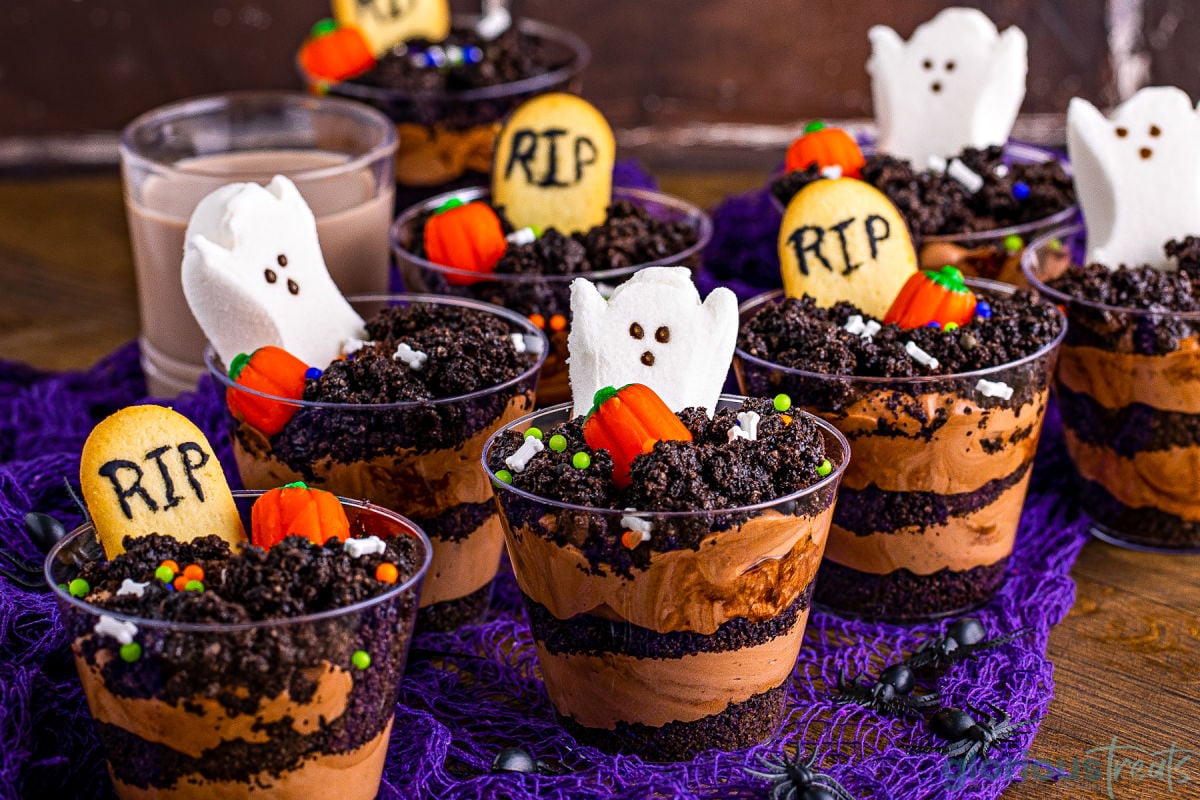
Halloween Graveyard Dirt Cups are just the cutest spooky treat for Halloween! A festive take on the traditional pudding dirt cup dessert, this version utilizes fun halloween candies and cookies decorated to look like tombstones! This adorable dessert is devilishly easy to make and will stand out on any treat table during the spooky season.
For more easy to eat Halloween treats try these delicious favorites: Halloween Sprinkle Cookies, Halloween Candy Bark and Candy Corn Cheesecake Mousse!
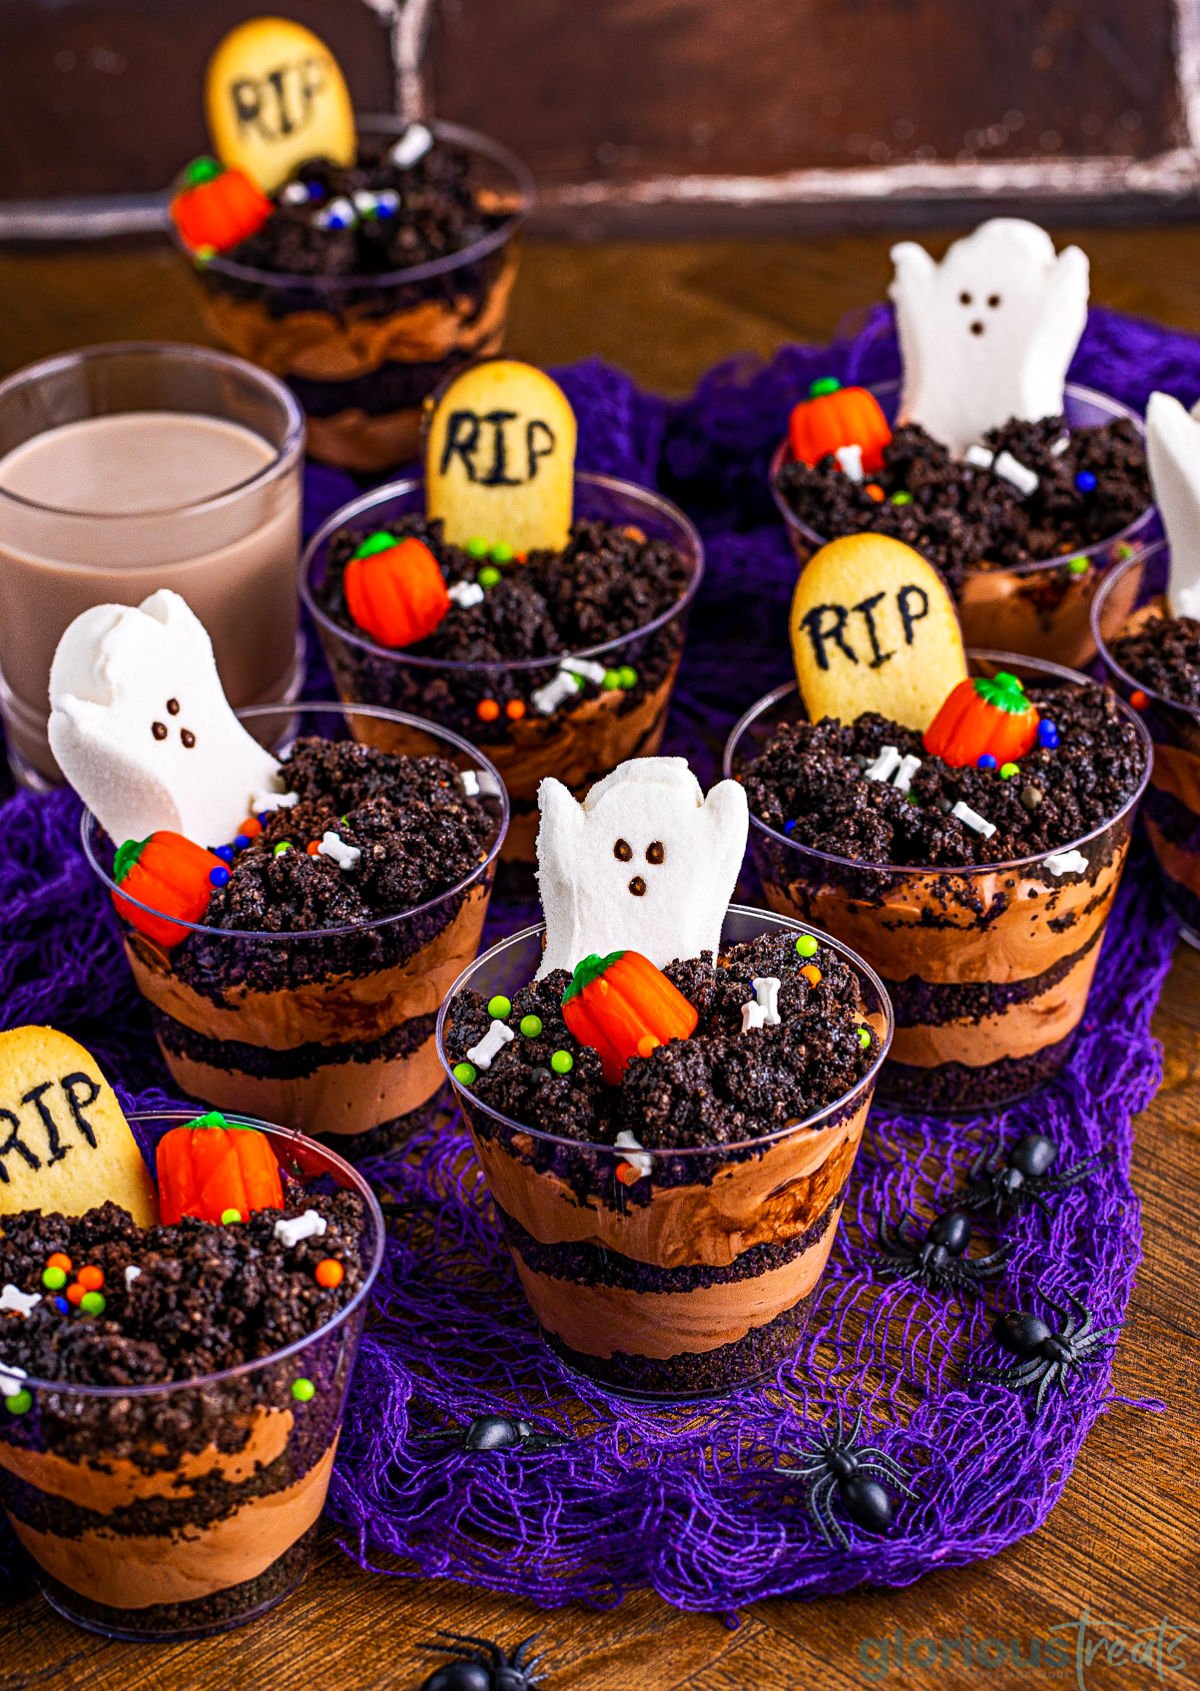
Halloween Graveyard Dirt Cups
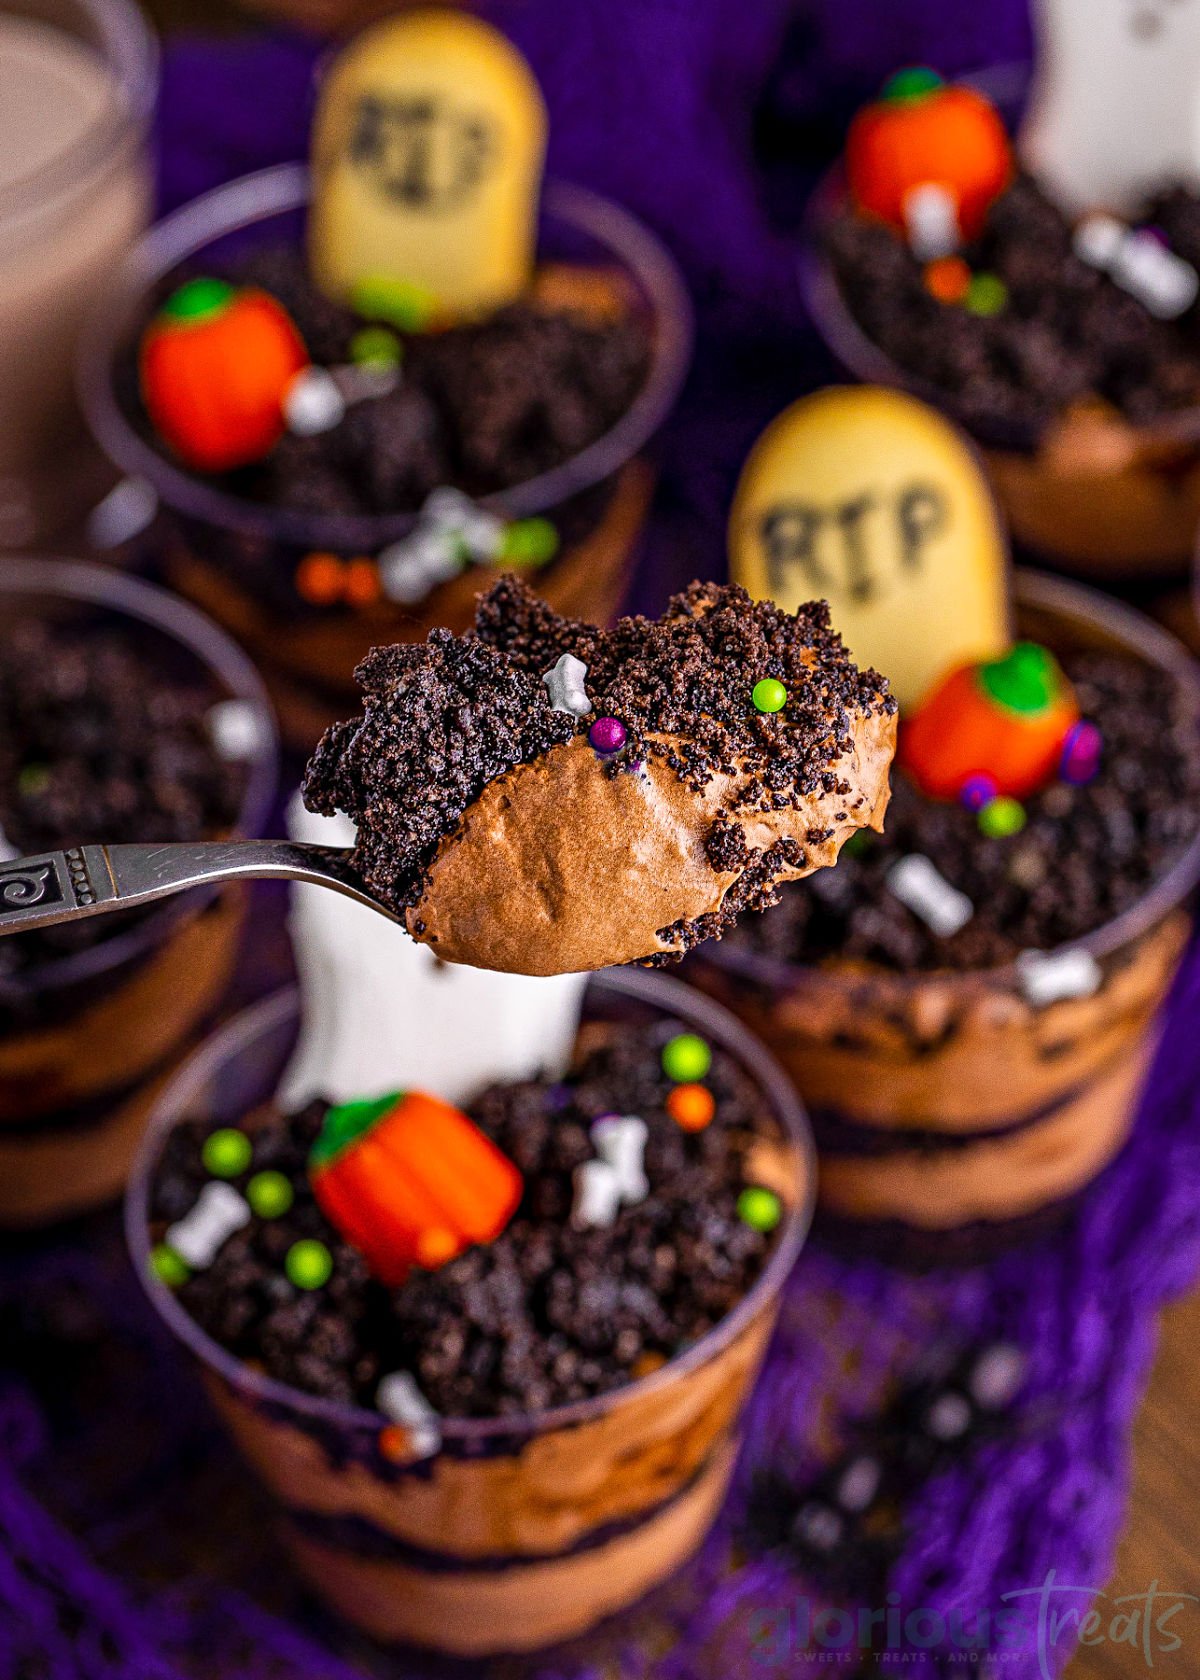
Spooky, scary skeletons and grim, grinning ghosts can be as delicious as they are cute! This frightfully festive dessert will be the talk of Halloweentown when you unveil them at your next party or family fright night. Rich chocolate pudding is mixed with whipped topping to create a yummy chocolate mousse and layered with crushed Oreos, topped with chocolate syrup.
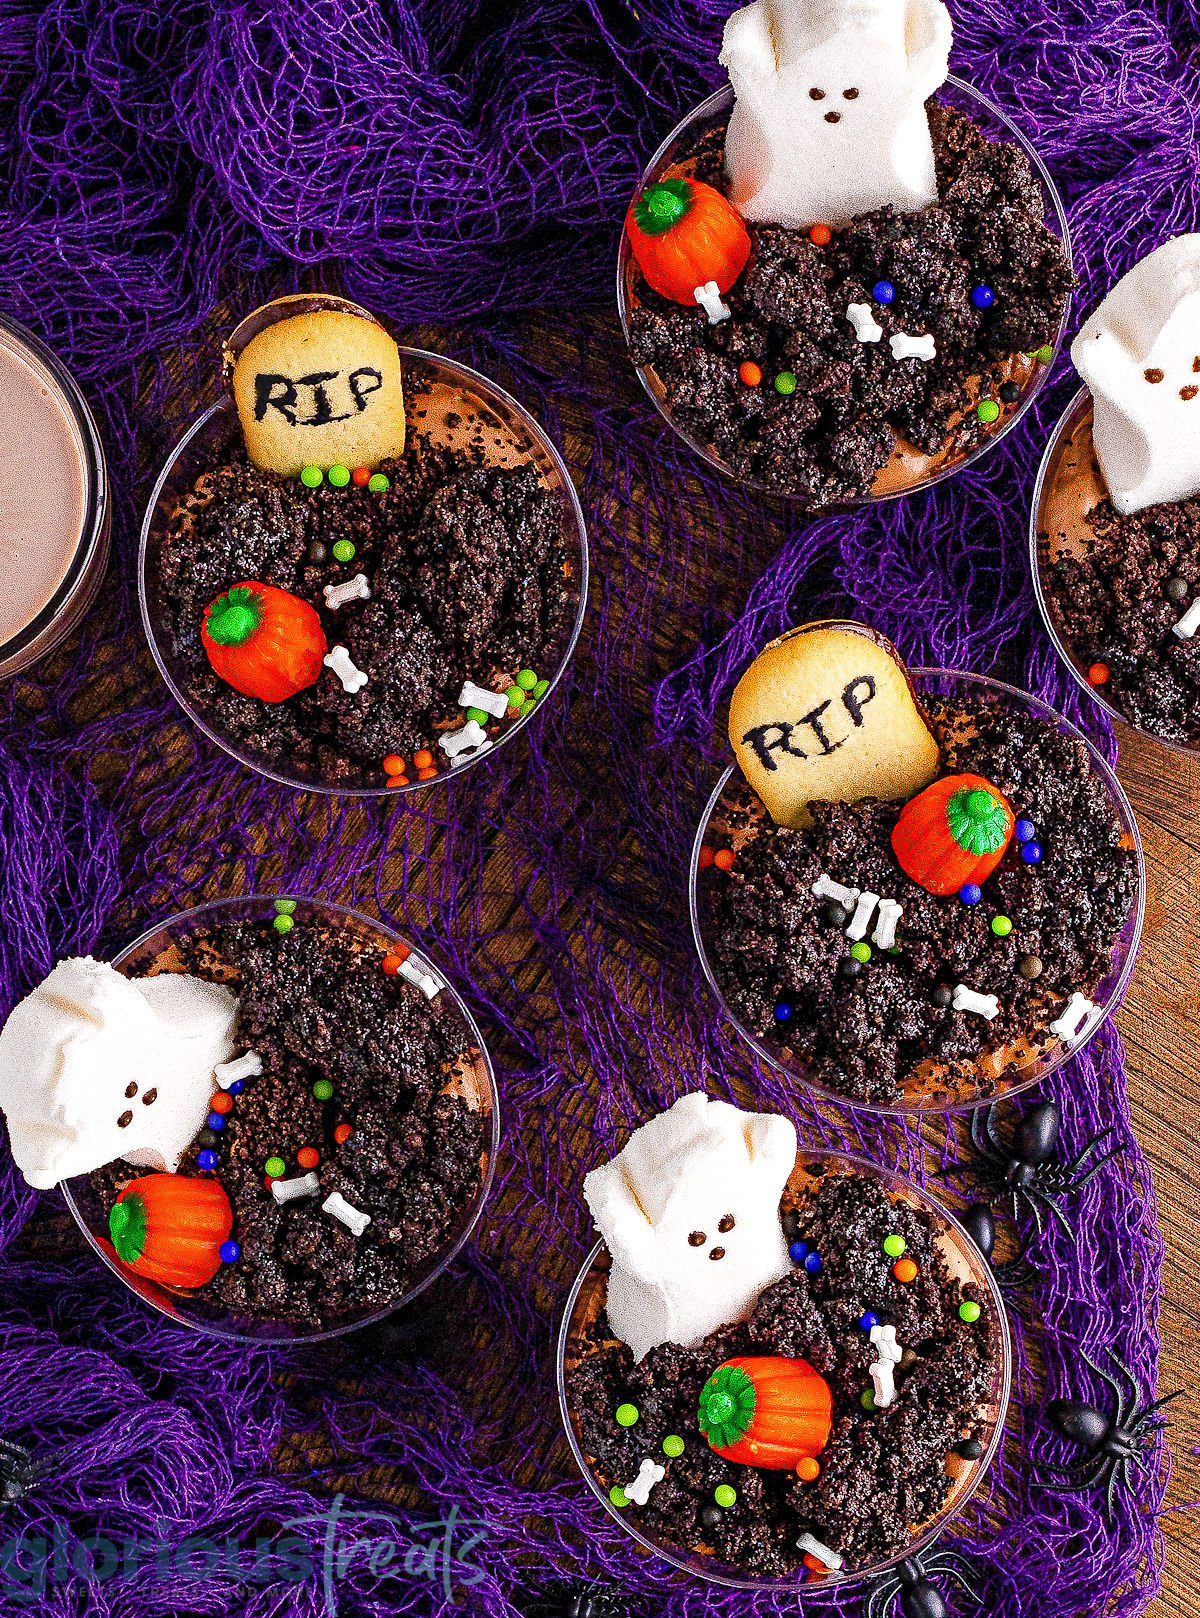
Complete your graveyard with cookie tombstones, ghost shaped peeps, candy pumpkins, and creepy, crawly gummy worms!
More Halloween Treats
- Fall Dessert Charcuterie Board
- Halloween Candy Bark
- Homemade Caramel Corn Snack Mix
- Snack Lovers Krispie Treats
- Cute and Creepy Halloween Treats {and a free printable!}
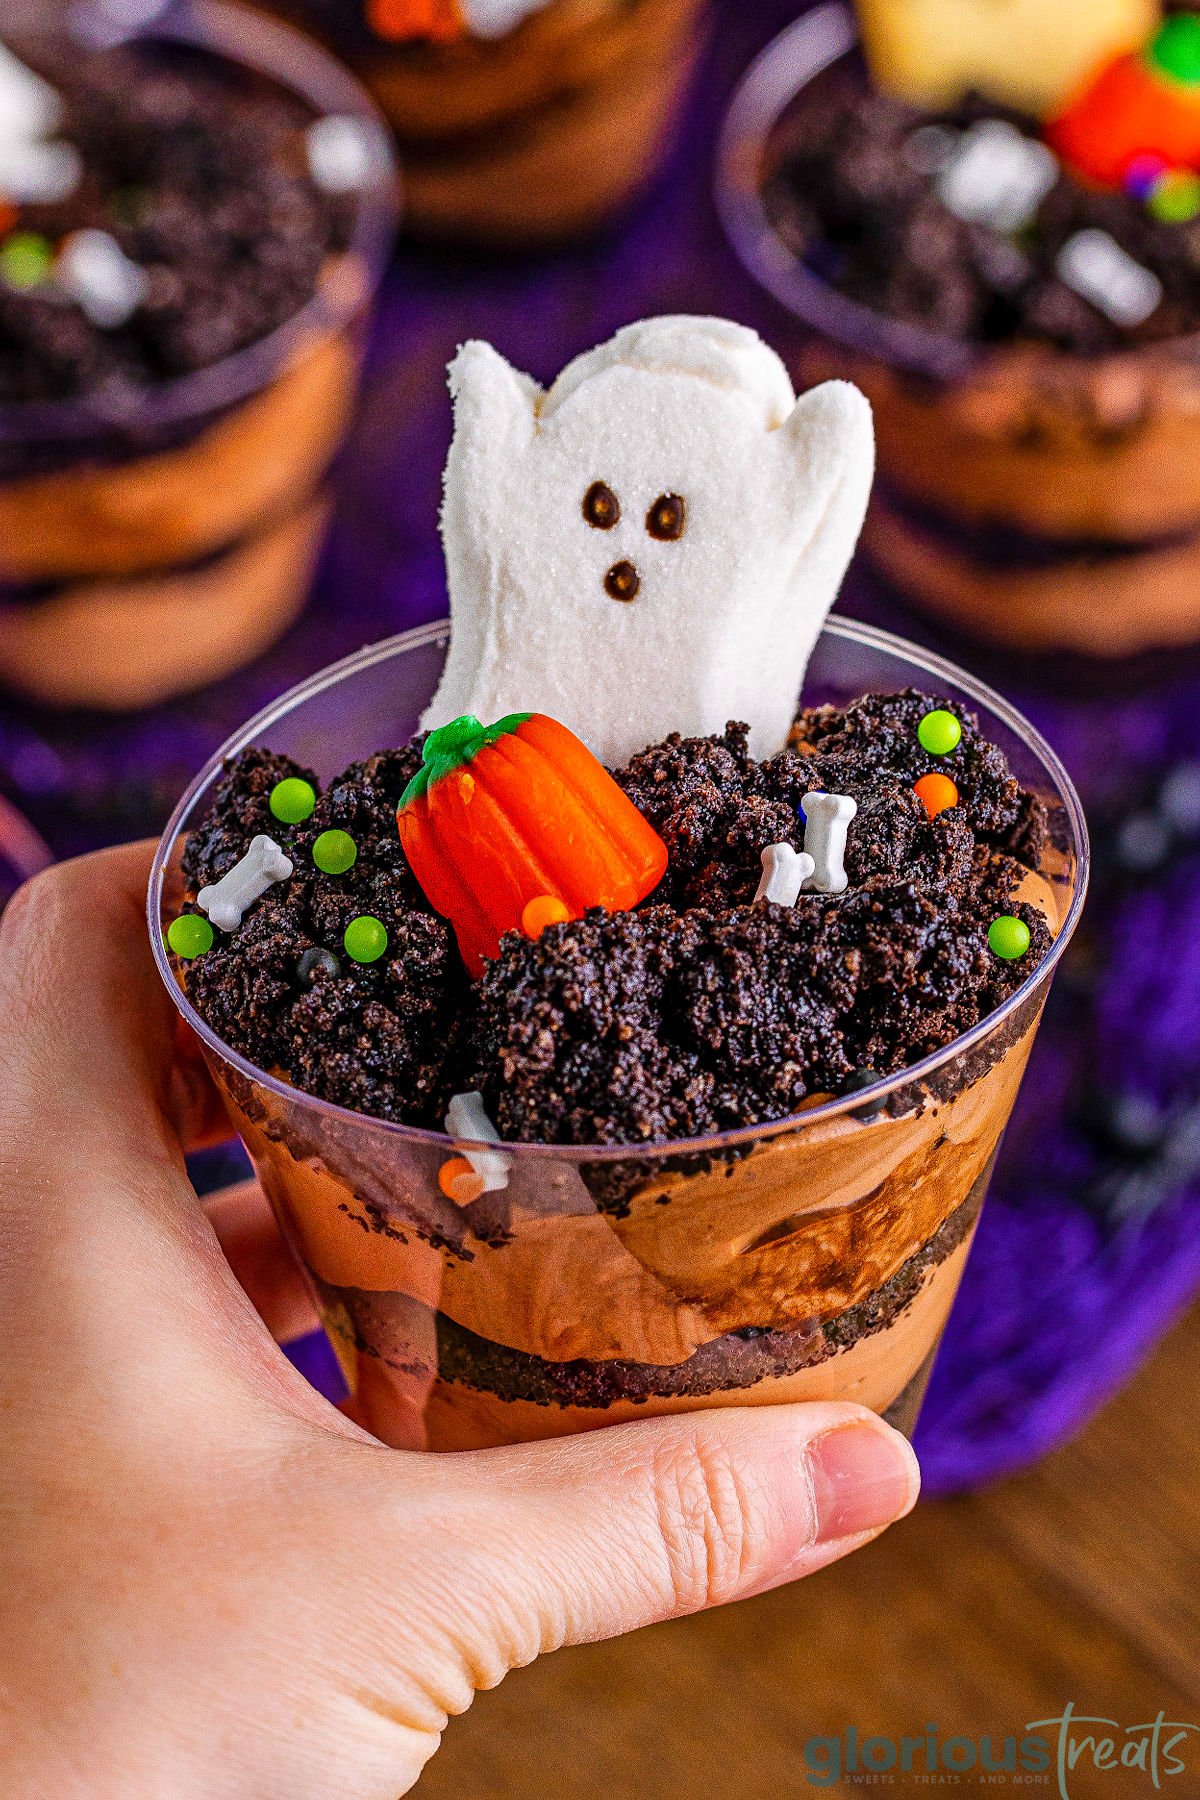
Recipe Notes:
Planning on making these ahead of time? Assemble the cups but don’t add any of the decorations until just before serving.
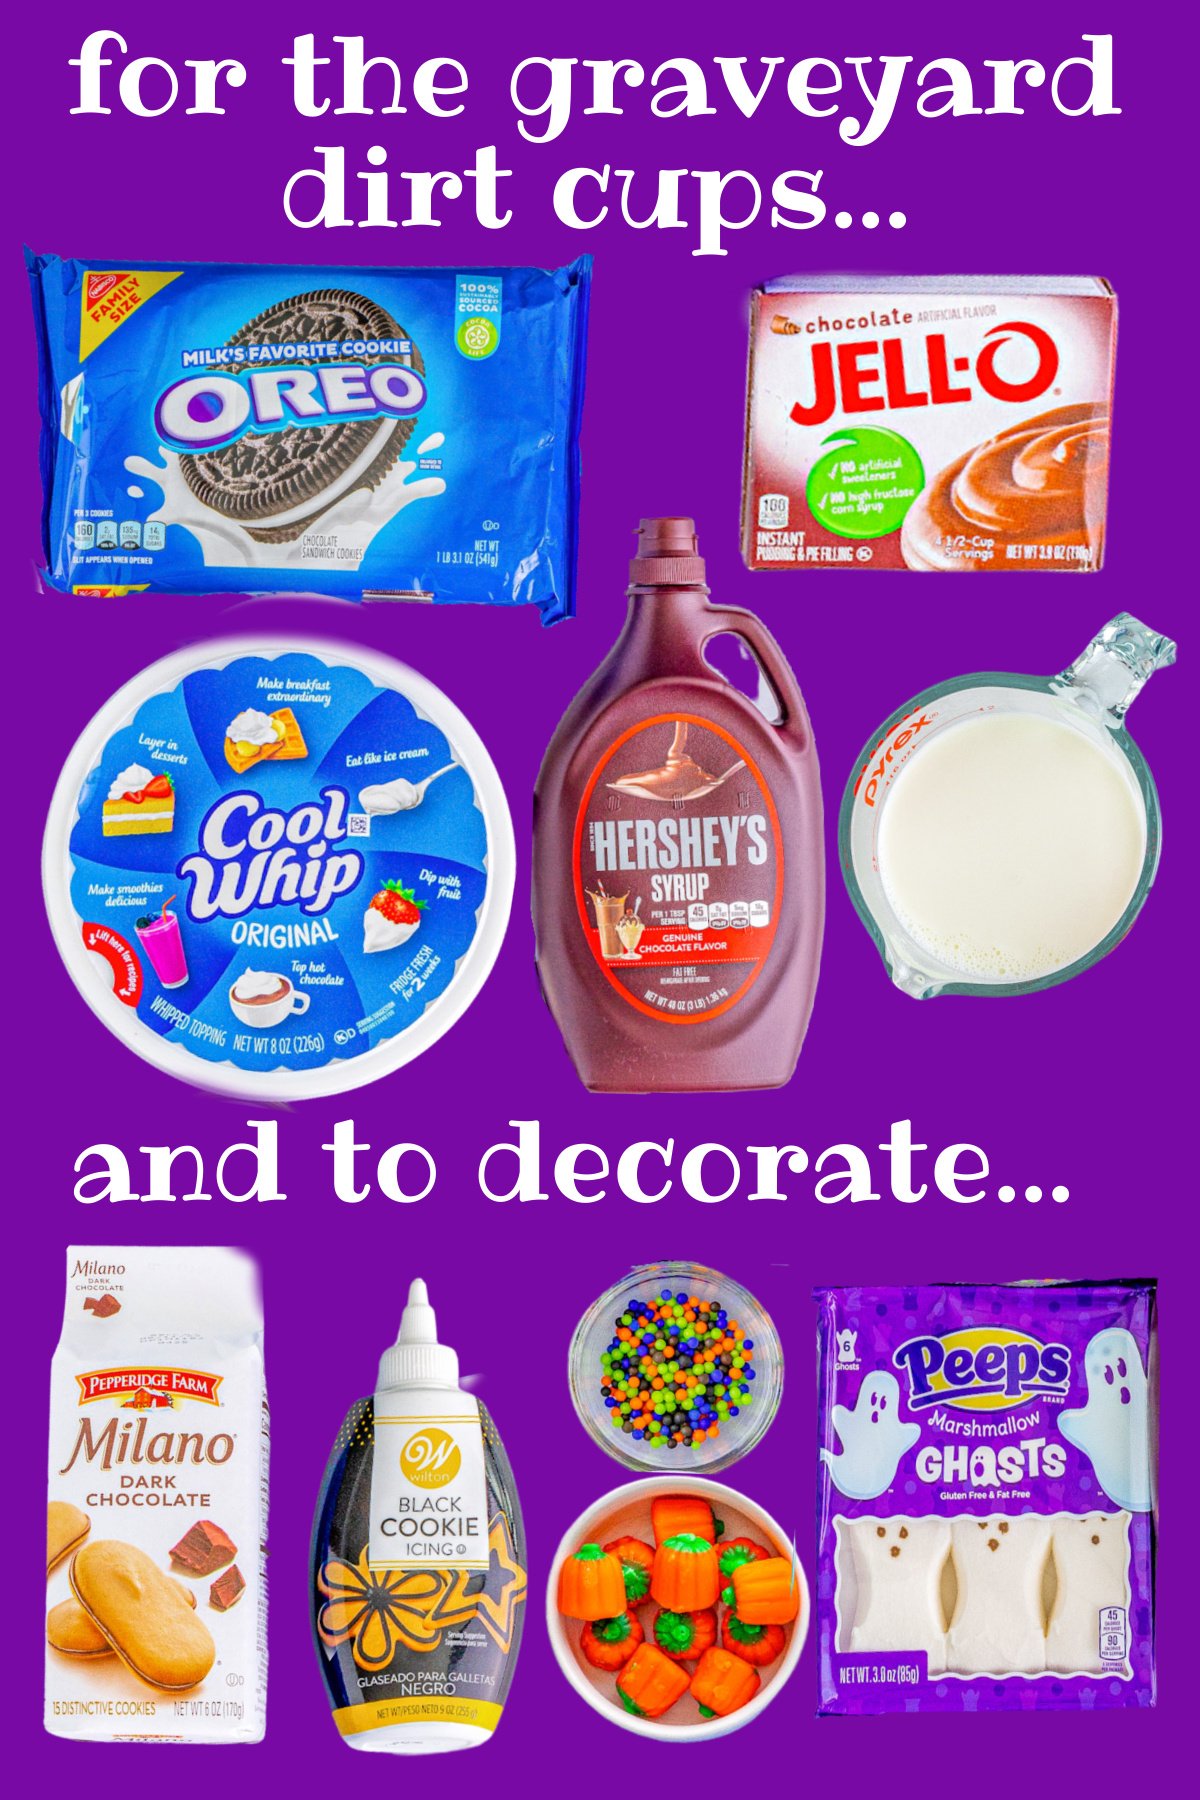
Halloween Graveyard Dirt Cup Ingredients
Ghosts, pumpkins, and worms galore! Who wouldn’t want to dig into these delicious graveyard themed dirt cups! As always, you can find the full printable recipe with complete instructions in the recipe card at the end of this post. Let’s take a look at what you’ll need…
For the Dirt Cups
- Oreo cookies – You’ll need a family size container.
- whole milk – This should be kept very cold.
- instant chocolate pudding mix – You can use your favorite brand.
- whipped topping – Be sure to thaw the whipped topping before mixing.
- chocolate syrup – you’ll need this for the pudding mixture and then again with the OREO cookies to create the “fresh dirt”.
For the Decorations and Tombstones (all optional)
- Milano cookies – These will be our tombstones.
- black cookie icing – To add an epitaph to the tombstones.
- ghost peeps – You may be able to find ghost candies if you aren’t a fan of marshmallows.
- gummy worms – Sour or regular.
- optional ideas – Mini pumpkin candies and Halloween sprinkles.
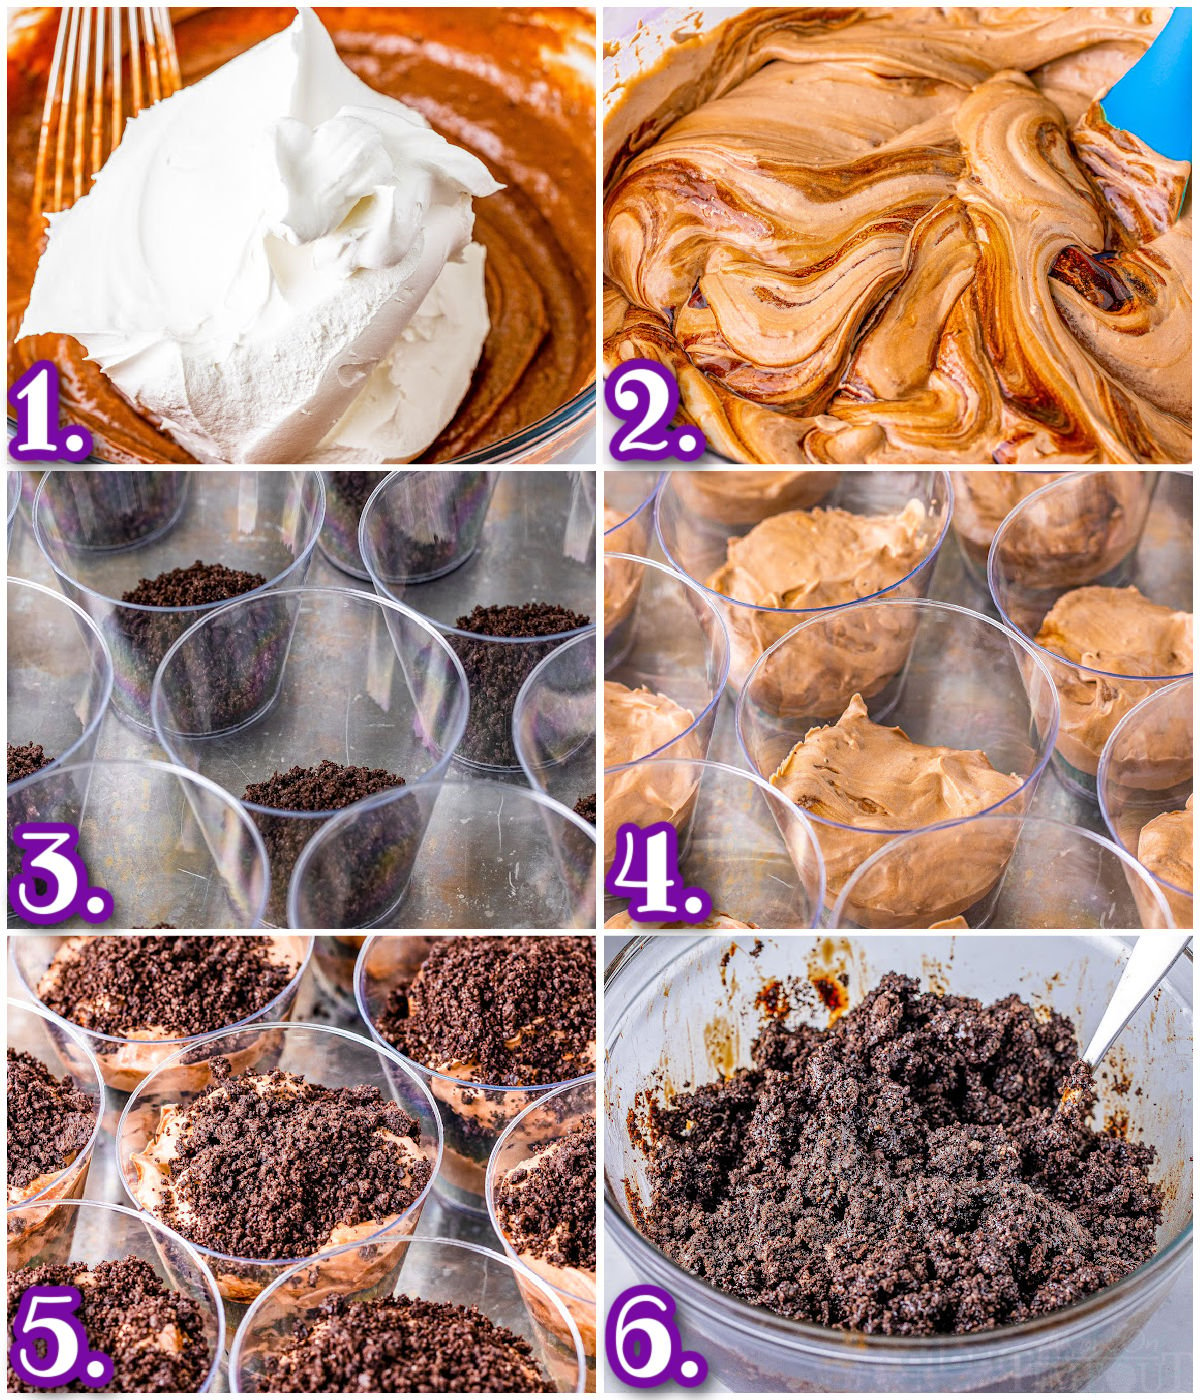
How to Make Halloween Graveyard Dirt Cups
Assemble the Cups
- Place the Oreos into a food processor and pulse into fine crumbs to create the dirt. Set aside.
- Whisk the cold milk and chocolate pudding mix together for two minutes. It should begin to thicken. Fold in all the whipped topping, mixing until no white streaks remain and a mousse has formed.
- Add about ¼ cup of chocolate syrup into the mixture and stir a couple times. Don’t over stir as you want the pudding mixture to have visible streaks of syrup throughout. Refrigerate the chocolate mixture until you are ready to put together the cups.
- Arrange nine 8 ounce cups to begin assembling the graveyards. Layer 2 tablespoons of the Oreo crumbs in the bottom of each cup. Add 3 tablespoons of the pudding mixture over top. Continue alternating layers until filled.
- Sprinkle additional Oreo crumbs on top of the last pudding layer.
- Create the “mud” or “fresh dirt” by mixing together the remaining chocolate syrup and Oreo crumbs. This mixture should come out shiny and clumpy. Set aside.
These desserts assemble beautifully in any size, clear, disposable cup. A 6 ounce cup works great too!
Time To Decorate
- Create tombstones by using the black frosting and icing the Milano cookies with spooky phrases like “RIP” or “BOO”.
- Decorate the “graveyard” scene in each of the cups. Add in the ghost peeps and grave markers to your cups.
- Sprinkle in the “fresh dirt” mixture in front of the tombstones to look like a newly dug grave.
- Decorate the graves with worms, sprinkles, pumpkin candies, etc.
- Chill the dirt cups until ready to eat or serve right away and enjoy!
Trish’s Tips and Tricks
- If you don’t have a food processor, you can place the Oreos in a plastic bag. Seal the bag and crush cookies with a rolling pin or mallet until you create fine crumbs.
- This recipe can be doubled to make larger batches for parties or school events.
- You can replace the whipped topping with your own, homemade sweetened whipped cream if you prefer!
- Get creative with your decorations! Try candy bones or even mini monsters (just make sure the kiddos know those are a prize and not edible!)
Storage Information
You can store leftovers in the fridge for up to 5 days. Cover in plastic wrap or keep in an airtight container. This particular treat doesn’t do well with freezing so I don’t recommend trying to store them that way.
Halloween Graveyard Dirt Cup FAQs
Can I Make These Ahead Of Time?
Absolutely! If you want to go ahead and assemble the dirt cups a day or two before your party they will stay fresh in the fridge. I do recommend holding off on decorating them as the cookies and candies can absorb some of the moisture and start to get mushy. The gums tend to harden in the fridge for too long as well so it’s best to add the finishing touches just before serving!
Is This A Kid Friendly Recipe?
It definitely is! If you’re looking for a way to get the kids involved in the festivities or just to show them how to have fun in the kitchen, this recipe is perfect! For older kids it’s a great way to showcase how to safely use a food processor. And for younger kids you can use the bag and rolling pin method so they can easily work through each step. Just keep an eye on how much of the candy goes into little mouths as opposed to the dessert cups!
More Halloween Themed Recipes
- Ghost and Mummy Oreo Balls
- Candy Corn Cake
- Bubbling Cauldron Treats
- Candy Corn CakeHalloween Marshmallow Pops
- Candy Corn Krispie Treats
How To Make Halloween Dirt Cups
Halloween Graveyard Dirt Cups
Ingredients
- 19.1 ounces Oreo cookies family size
- 2 cups whole milk very cold
- 3.9 ounces instant chocolate pudding mix one package
- 8 ounces whipped topping thawed
- ½ cup chocolate syrup divided
For tombstones and decorations:
- Milano Cookies
- black cookie icing
- ghost peeps
- gummy worms
- mini pumpkin candies
- Halloween sprinkles
Instructions
- Place Oreos in a food processor and pulse until fine crumbs remain. Set aside.19.1 ounces Oreo cookies
- In a large bowl, whisk together the cold milk and chocolate pudding mix for 2 minutes, until it begins to thicken. Fold in the whipped topping until no streaks remain.2 cups whole milk, 3.9 ounces instant chocolate pudding mix, 8 ounces whipped topping
- Add ¼ cup of the chocolate syrup and give it a few stirs – don’t over mix. You want the mixture to have streaks in it. Refrigerate until ready to assemble.½ cup chocolate syrup
- Lay out nine 8 ounce cups. Place 2 tablespoons of the OREO crumbs in each cup. Spoon 3 to 4 tablespoons of the pudding mixture on top of the crumbs. Repeat.
- Sprinkle another tablespoon of the OREO cookie crumbs on top of the last pudding layer in each cup.
- To create the “mud”, stir in the remaining 1/4 cup of chocolate syrup with the remaining cookie crumbs.It should look shiny and clumpy. Set aside for now.½ cup chocolate syrup
To Decorate
- Use black icing and the Milano cookies to create grave markers.Milano Cookies, black cookie icing
- Now decorate the “Graveyard” scene for each cup. Add peep ghosts (will need to press into the pudding mixture so they stand up) and the grave markers as desired. You can put one of each in each cup or use just one per cup.ghost peeps
- Now sprinkle the “mud” mixture on top. It should resemble a freshly dug grave.
- Finally, decorate with pumpkin candies, worms, Halloween sprinkles, etcgummy worms, mini pumpkin candies, Halloween sprinkles
- Chill cups or serve immediately.


Leave a Reply