Purple Ombre Mini Cakes
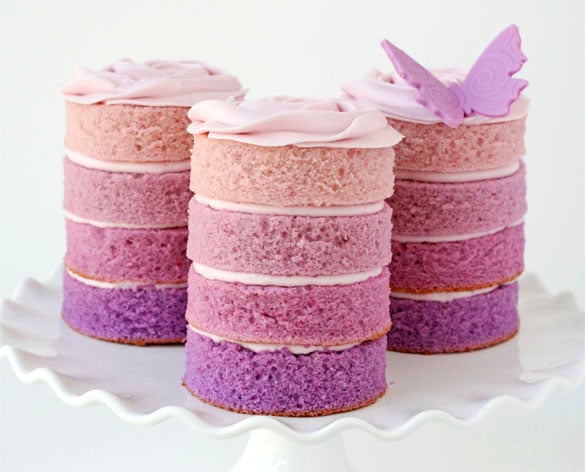
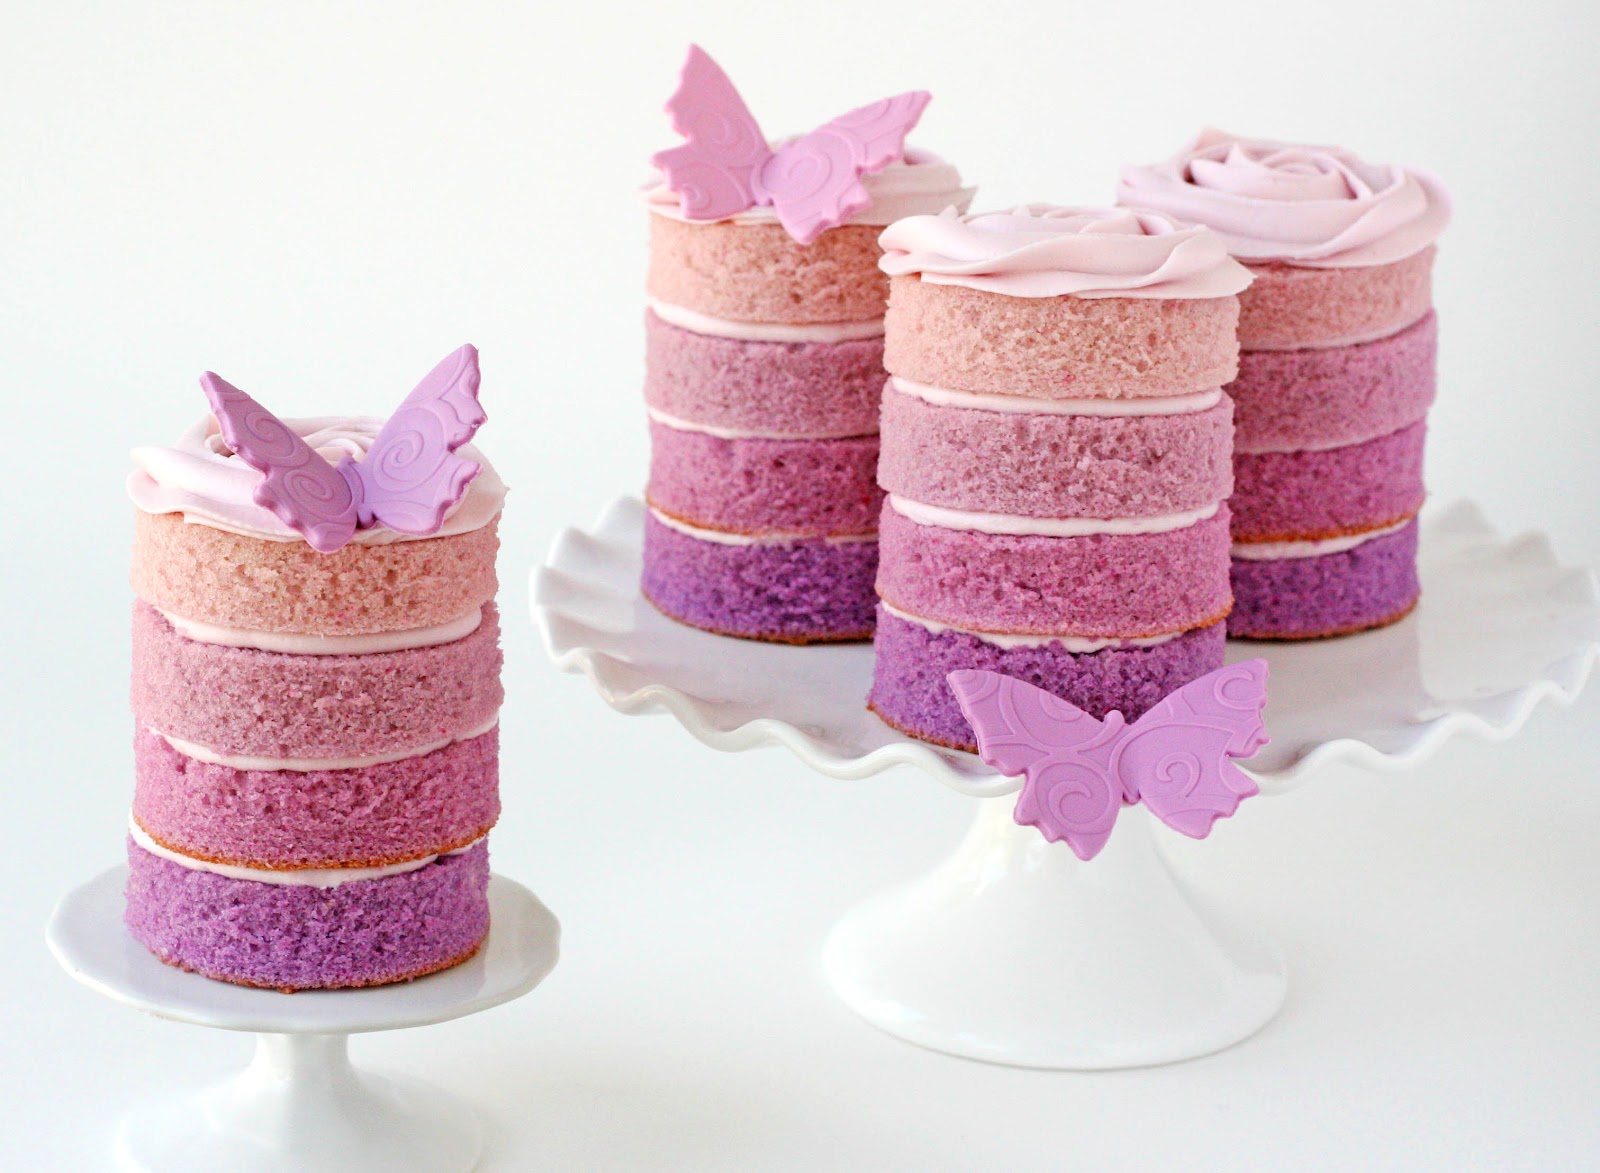
With Mother’s Day just around the corner, I wanted to create a special dessert that would be perfect to honor Moms. I made a Pink Ombre Swirl Cake last summer, and have been wanting to make another pretty ombre (layered color) cake ever since. This time, instead of one large cake, I made several mini cakes. I also left the outside unfrosted, to reveal the pretty layered colors of the cake itself. Purple is often a color I think of for Moms, and it’s one of my favorites as well.
This general ombre (layered color) concept could be done lots of different ways, and with most any color scheme. I’ll lay out the steps I used to make these mini cakes, but feel free to adjust the process for different sized cakes, or according to your ideas and preferences.
~ How to make Purple Ombre Mini Cakes ~
1. Prepare vanilla cake batter, using a box mix or a scratch recipe.
My notes ~ I have a great go-to vanilla cake/cupcake recipe, but this time I used a box mix (Betty Crocker French Vanilla). I mixed up TWO box mixes, and then had enough batter left over for 12 cupcakes. Depending on the size pans you use for the purple layers, you could probably accomplish this with only one box mix (or batter that makes about 24+ cupcakes).
2. Divide the batter into 4 bowls and color as desired.
My notes ~ If you have 4 of the same sized round baking pans, then each bowl of colored batter should have equal amounts in it. I don’t have 4 of the same size, so I used 2-8″ pans and 2-9″ pans. Because of this, I put 1 cup of batter in two bowls, and 1.5 cups of batter in two bowls, colored it as desired, then poured the smaller (1 cup amount) of batter into the 8″ pans, and the 1.5 cups of batter into each 9″ pan. For the colors shown, I used Americolor Regal Purple and Electric Purple. I added one full drop of each color in the darkest batter, and used less than a drop (a small amount on a toothpick) for the other layers.
3. Pour batter into prepared baking pans (pans should be oiled, floured, and lined on the bottom with parchment paper).
4. Bake as directed by recipe. Cool cakes on cooling rack. Remove cake from pans, and move to a cutting surface. Level the cakes (cut off the top dome), as needed.
5. Use a round cookie cutter to cut circles of cake from each layer.
My notes ~ I used a 2 3/4″ cookie cutter and I was able to make 4 mini layer cakes (as shown), with cake scraps left over. I think if you used a 2 1/2″ cutter, and baked all your batter in 9″ (round) cake pans, you would be able to make 5 mini layer cakes.
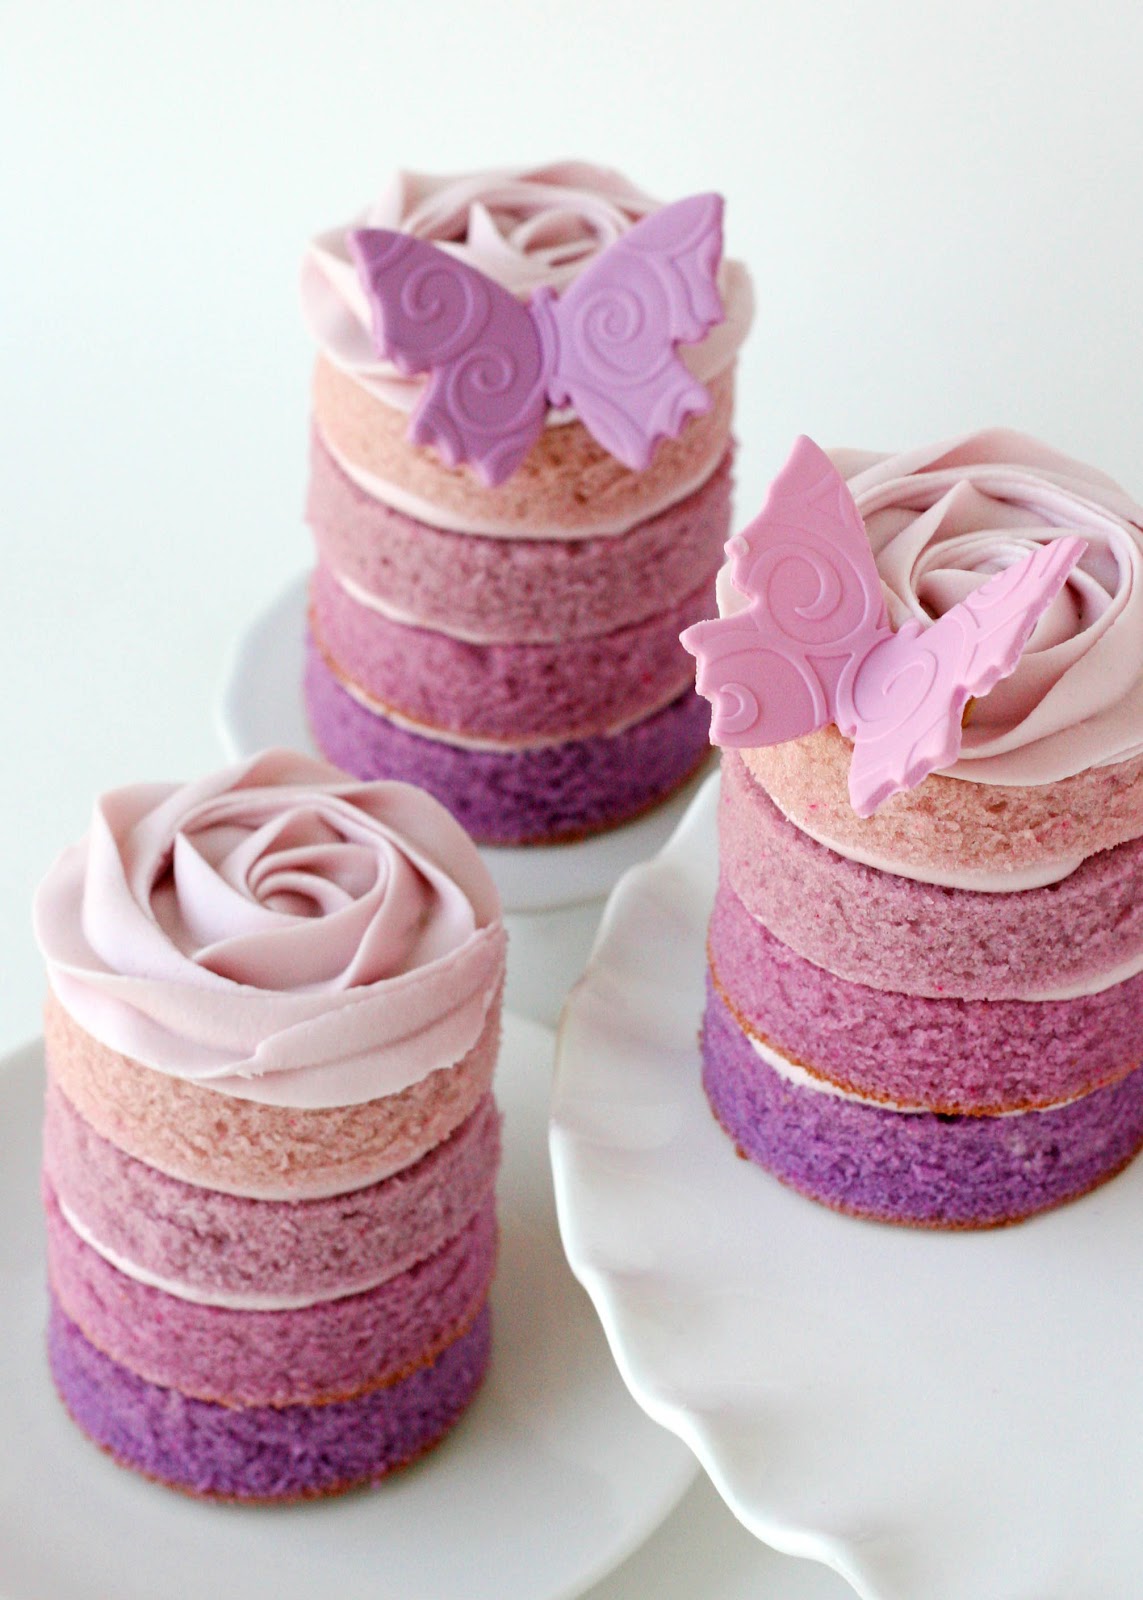
6. Layer cakes as desired, piping a swirl of frosting between each layer. Frost the tops of the cakes as desired.
My notes ~ I prepared a batch of my favorite Vanilla Cream Cheese Frosting (you could use simple American Buttercream if you prefer). I piped a layer of frosting (between the cake layers) using a medium sized round tip (a Wilton #12). I finished the cakes with a rosette of frosting, using a 1M tip, frosting from the center of the “rose”, spiraling toward the outside. I have a video showing how to frost cupcakes in this way, in my post on How to Frost Cupcakes. I finished the mini cakes with a fondant butterfly. I will share a post on how I made the butterflies later this week.
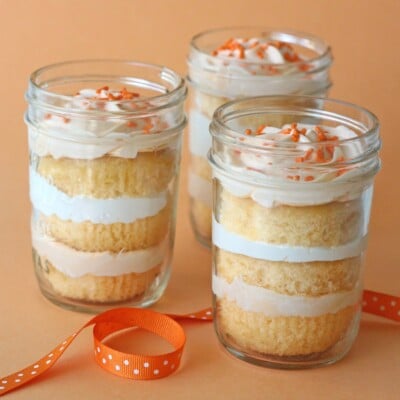
Looking for more pretty Mother’s Day ideas? My Hydrangea Cupcakes are a beautiful, and surprisingly simple way to make a statement. Or my original, Pink Ombre Swirl Cake could be a gorgeous gift (to share).
Want to make the pretty fondant butterfly accents? I’ve posted a full tutorial on How to Make Fondant Butterflies.


WOW these are stunning! Love the colors!
These are very simple but absolutely amazing! I love the color and butterflies. You did a amazing job!!
I love that you haven't covered them in icing – the ombre effect is so striking. Absolutely stunning!
Which brand and colours did you use to tint the cake batter?
These are beautiful! I love the colors.
Anna
http://www.askannamoseley.com
What pretty little cakes – love the purple ombre!
Ooooh, I love these!! Purple is my favorite color!
Sooo beautiful I love the colors!!
These are so pretty! I might have to try making a rainbow version! I just want to say I love following your blog. I've been quietly following since I came across your treats on Flickr a year or two ago. I used to be ArtsySmarts on Flickr, now Fresh Baked Fun. Thanks for the inspiration!
Nicole
http://www.freshbakedfun.blogspot.com
Gorgeous! I love these!
So pretty!
These are so very pretty!
So pretty! And the colours look great
So beatiful!So Pretty!
These are beautiful, I love anything ombre! The rose piping on top is amazing as well
The color gradient is just so appealing! So clever of you to leave the layers unfrosted.
lovely cake! Hugs & kisses!
These are gorgeous! I love the icing and the butterfly decoration!
http://bel-bien.blogspot.com/
Wow these are pieces of art! Love them!
Beautiful!
Beautiful Glory,
always in awe of your photography!
Oh wow! These are absolutely lovely! Awesome job!
SO cute! Love the purple
so cute, did you find that they dried out quickly? i would love to make them but worry I would have to make them just before serving. And I cannot wait to see how you make your butterflies, I have to make some and want to see how it's done.
It is the most amazing things I HAVE SEEN LATELY and I've seen a lot of them!
Oh how I love what you do – you create edible magic! Maryann
I love these, Glory! I had already bookmarked your vanilla cake with lemon filling to make for Mother's Day but now I think I'll do this version of it, instead! Thanks for posting this!
I am in love with these. Just gorgeous!
These are just beautiful. You do such gorgeous work. I need to go see some of your tutorials that I've missed. Love these. Thanks for sharing your wonderful idea. It IS perfect for mothers day.
Nann
atnannstable.blogspot.com
Stunning! I love the colors and leaving the edges plain with the frosting on top really makes it even more beautiful! Awesome Glory!!!
Just gorgeous!
I'm dying over here!!!! These are gorgeous!!!!! OMG!!!! I'm gonna have to make something similar for my nieces 5th birthday party. Goodbye cupcakes, hello mini cakes!!!! THANK YOU!!! You are amazing! I love them so much I had to comment here and on your Facebook page!
these are so beautiful, I just love the colors!
These could not be any prettier. I love them!!!
Those are awesome! My mom used to bake bread in coffee cans to make cute little round loaves. I wonder if you could do the same thing here. You could make each loaf a different color, then slice them and shuffle the colors however you want. No wasted pieces!
Looking at these just make me smile. Beautiful and cheerful!
These are just incredibly gorgeous! So refined and beautiful, I'm not sure I could equal that!!
Beyond gorgeous…absolutely glorious!
I absolutely love these. May I share this on my site http://www.igottatrythat.com along with your link. Too cute!
Thanks, Marcie
marcieis@yahoo.com
Bonjour,
je suis une Fan française
tout d'abord bravo, c'est vraiment magnifique !
est ce qu'il est possible de nous traduire la recette en détail en français.
pouvez-vous faire evoluer votre blog les personnes comme moi qui ne maitrise pas l'anglais
merci et bonne continuation !!
another way i've done this is baking them in cans (with top and bottom removed) standing up in a baking dish.. then slice them and assemble with frosting
The mini layer cakes look adorable, so perfect as a gift for Mother's Day.
Thanks for sharing your tips.
Gorgeous! I love the color and design!
ciao dall'Italia! il tuo blog è molto bello! proverò alcune tue specialità! ^__^
se ti va passa a trovarmi!
Hi,
This cake looks absoultely fabulous. I used your vanilla cake recipe step by step and as I had 8 inch cake pans, doubled the amount of ingredients. Divided the batter into 4, coloured them different shades of purple and pink. Put them in a pre-heated 180 Celsius oven for 25 mins. When the cakes had cooled, I used a round cutter and to my astonishment none of the 4 parts had changed color. In fact they looked like ordinary vanilla cakes, extremely moist and delicious but no colour. Could you please let me know where I've gone wrong
I'm so disappointed.
I pinned these on Pinterest and have about 40 repins in a matter of a few hours. They are so cute and sooo popular on pinterest now! Hope you get tons of hits
So pretty! I love the presentation. Lovely!!
Amy R.
{plain & fancy living}
twitter: pfliving
Love, Love, Love, Love, Love, Love, Love, these! Can't wait to make them for me and my Mom! Thanks!
Very pretty! What plunger, cutter or stamp did you do the butterflies out of?
Your Ombre cake was featured on Oprah's blog yesterday. Congrats!!
http://www.oprah.com/blogs/Mays-Must-Try-Food-Guide?FB=fb_omag_may_foods
@Cindy- Thanks so much for letting me know! XX
Que preciosidad, me encanta y la presentación es de cine!!
Un besete y buen finde!!
these are so beautiful!!
I Want to eat these cakes..
http://internetricks4u.blogspot.in/
These are so gorgeous!
These are WOW-WOW-WOW, I'm speechless!
Spectacular…!
These look beautiful! Well done
The cakes are beautiful and I can't wait to try them!
Where did you get the individual stands…I just love them?
oh I LOVE these! So beautiful!
so beautiful
Awesome and seriously cute! Thanks for adding the link on Pinterest so I could find your blog!
this is SO gorgeous, I really want to try and make an ombre cake one of these days. Beautiful!
I love purple soooo much this are soo right for me
OMG this is the most beautiful mini cake I’ve seen!!! They look absolutely gorgeous and elegant! I’ll try making these for sure!
Thanks so much for sharing these beautiful pictures and recipe!
Talk about BEAUTIFUL! Thank you for the gorgeous inspiration on this Sunday.
LOVE THEM! Thinking about doing them for my sisters bridal shower, but how do you transport them?
I’d have to do like 70!
This is such a fabulous design. I’m finishing up these today at my sister-in-law’s baby shower. It will be slightly different because it’s pink and only three tier. The video tutorial was fabulous because I didn’t know how to make a rosette. Thank you for your great work here. I will be linking back to you tomorrow.
So creative and beautiful. I do have a question, where did you get the butterfly on the cake? Was it a mold?
Glory replied: — August 3rd, 2012 @ 6:11 pm
Venetrise- Thanks for the question! I wrote a full tutorial on the butterflies, but I guess I never went back to this post and added a direct link. I’ve updated this post now =) And here is the link, http://www.glorioustreats.com/2012/05/how-to-make-fondant-butterflies.html
Beautiful! Wish I could learn to make the actual cakes to add to my food styling stints.
Hope to see more of these!
Hey! I need this in German language! Can you help me???
Absolutely beautiful! What a vision! I love your page.
This “pastry chef” is claiming to have made your cake using your very same picture on his Facebook page http://www.facebook.com/photo.php?fbid=479211555433447&set=pb.444881175533152.-2207520000.1354195577&type=3&theater
Just thought you should know…
Keep up the good work =)
Made these cakes for my daughters 17th birthday- on Christmas Day. Several pointers- after baking the cakes, freeze or chill them. This makes it much easier to get a ‘clean’ cut when cutting out he mini cakes from the larger ones. I used 4 drops of electic purple, then 3, 2 and finally 1. After assembly, but before piping the rose on the top, I rolled the sides in pale purple edible glitter.
Hi! Absolutely beautiful. One question, did you also slice the cake to get the same thickness for each color/layer? Please let me know! Love all your work! Fabulous.
καλησπερα ειμαι απο Ελλαδα και θα ηθελα να μαθω στο ελληνικα μεταφραση πως φτιαχνονται αυτα.ευχαριστω πολυ…Grecce
it’s a maizing mini cake my mam love it soso much
Thank you for this recipe idea. I tried to make it for my own (with white chocolate ganache cream). And it’s fabulous!