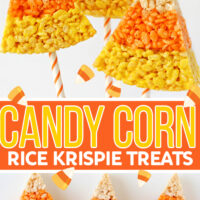
These cute and creative Candy Corn Krispie Treats are perfect for fall and Halloween parties! Quick and easy to make, these adorable treats are sure to be loved by kids and adults alike!
Love all things Halloween? Make sure to check out my Halloween Graveyard Dirt Cups, Halloween Sprinkle Cookies and Halloween Candy Bark!

This summer I made some fun Watermelon Slice Krispie Treats, and it recently hit me that I could use the same general concept to create Candy Corn Krispie Treats!
I love rice krispie treats, and I’m always drawn to cute desserts that incorporate the look of candy corn, so these treats are a perfect combo!
Although the assembly process does take a bit more time than a traditional batch of rice krispies treats… they are still much quicker to make than a decorated cookie, for example.
Wrap the final treats in cellophane bags, add some fun ribbon and you have an adorable fall or Halloween party favor.

What You’ll Need
The ingredients are just what you’d expect from a traditional Rice Krispie Treats with the addition of food coloring. I do recommend gel food coloring for richer color. Let’s take a quick look at what is in this easy recipe and, as always, you can find the full, printable recipe card at the end of this post.
- rice krispies cereal – You can use a name brand or store brand cereal for this recipe. You will need a little over 9 cups total.
- miniature marshmallows – I like to use miniature marshmallows because they melt quicker and more evenly.
- butter – A must for ooey gooey, buttery rice krispie treats!
- food coloring – You will need orange and yellow food coloring for this recipe.
Recipe Notes:
This recipe can be halved if you need just 8 wedges!
How to make Candy Corn Rice Krispie Treats
Following the recipe and instructions below, here are some photos to show you the basic assembly…
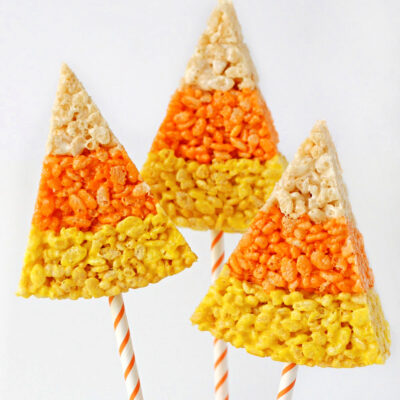
You’ll first create the outer ring which is yellow. Next will be the middle ring which is orange. Finally the center, white ring is added.
I used two 8 inch cake pans but 8 or 9 inch springform pans or 9 inch cake pans would also work.


")
If you like candy corn inspired treats, you’ll love these too…
How to Make Candy Corn Krispie Treats
Candy Corn Krispie Treats
Ingredients
For the yellow ring
- 4 ½ cups rice krispies cereal
- 5 cups mini marshmallows
- 3 tablespoons butter
- Yellow food coloring
For the orange ring
- 2 ¾ cups rice krispies cereal
- 3½ cups mini marshmallows
- 2 tablespoons butter
- Orange food coloring
For the white center
- 2 cups rice krispies cereal
- 2 ½ cups mini marshmallows
- 2 tablespoons butter
Instructions
- Assemble your ingredients and gather 2 large bowls (one must be microwave safe), two rubber spatulas, two 8″ cake pans and non-stick cooking spray.
- Also, have a stick of butter out, which you will need to use to grease your hands as you handle the krispie treat mixture.
- Spray the cake pans with non-stick spray and set aside. Also, lightly spray two rubber spatulas with cooking spray.
For the yellow ring
- Add 5 cups mini marshmallows and 3 tablespoons butter to a large, microwave safe bowl.
- Microwave the butter and marshallows about 3 minutes, or until warm and very puffy.
- In another large bowl, measure 4 1/2 cups rice krispies cereal.
- Carefully remove marshmallows from microwave and add yellow food coloring (I used 2 drops of yellow Americolor gel).
- Stir the melted marshmallows, butter and coloring until smooth and fully combined. Immediately, pour the marshmallow mixture into the bowl with the cereal. Use an oiled spatula and stir quickly until fully incorporated.
- Divide yellow rice krispie mixure between the two cake pans, and use your hands to create a “ring” around the inside edge of the cake pan (as shown below), about 1 1/2 inches wide. Rub a bit of butter on your hands as necessary to prevent the mixture from sticking to your hands. Work quickly, as the mixture is more difficult to mold as it cools.
- Wash your bowls and spatulas and repeat the same process with the ingredients for the orange ring, and then the white center.
- Once your three colors are pressed into the pans, allow to fully cool and set, at least 30 minutes. When you want to cut the triangles (candy corn shapes), flip over your cake pans onto a cutting surface, and tap pan on cutting board to remove krispie treat round. Cut the round large round in half, then quarters, then cut each quarter in half.
- To add a cookie stick, or paper straw (as shown), first create a hole with a wooden skewer.

I just made these for halloween. Great idea by the way! Everything looks perfect but the center “white” portion is so hard that you can’t even bit through it! What did I do wrong? I cover the treats in plastic wrap and left them overnight before I cut them up. Is that the problem? Thank you so much! Lori
Hi Lori, The texture of all three layers should be the same, and it should be the same crispy/chewy texture of regular rice krispie treats. I’m sorry, I can’t think of any reason they would be super hard? You should be able to keep them wrapped for up to 2 days.
What a great idea! I’d love if you’d stop by and link up over at my Candy Corn Recipe Round-Up
So cute! Definitely keeping these in mind for Halloween this year. 🙂
Hi, When i was young we use to be able to get those small yellow white and orange sweets in New Zealand, I loved them but can not get them or remember what they are called, would love to find some online if i knew the mane of them. thanks.
The candies that inspired these are called candy corn.
I made these last night for my nephew’s daycare class and they came out so cute! Thank you for the idea! 🙂
Just made these for “candy corn day” at preschool. So cute! I greased the *outside* of a metal measuring cup and used its rounded edge to help press the Rice Krispies into nice uniform rings and its flat bottom helped to level out the top. Also- if you need to make these gluten free you can use GF Rice Krispies and the recipe turns out perfectly!
Sure wish I’d seen your version before I made mine, which involved templates and cutting and some mental anguish. 🙂
http://gettingsveltetowooalexskarsgard.wordpress.com/2012/10/21/halloween-yummies-tricks-and-treats-part-one-candy-corn-rice-krispie-treats/
These are so adorable! Absolutely genius to serve them on sticks and keep everyones’ fingers marshmallow-free. Thanks for the inspiration!
These are very cute!
So Cute! So smart with the use of the cake pan!!!