This Black Forest Cheesecake recipe is so rich and indulgent – the perfect treat for any occasion! Creamy chocolate cheesecake on an Oreo crust all topped with freshly whipped cream and cherry pie filling! It’s sure to make your tastebuds dance! Perfect for holidays, BBQs and special occasions!
Love cheesecake? Make sure to try my Cheesecake Brownies, Cheesecake Recipe (a classic!) and Strawberry Cheesecake Mousse!
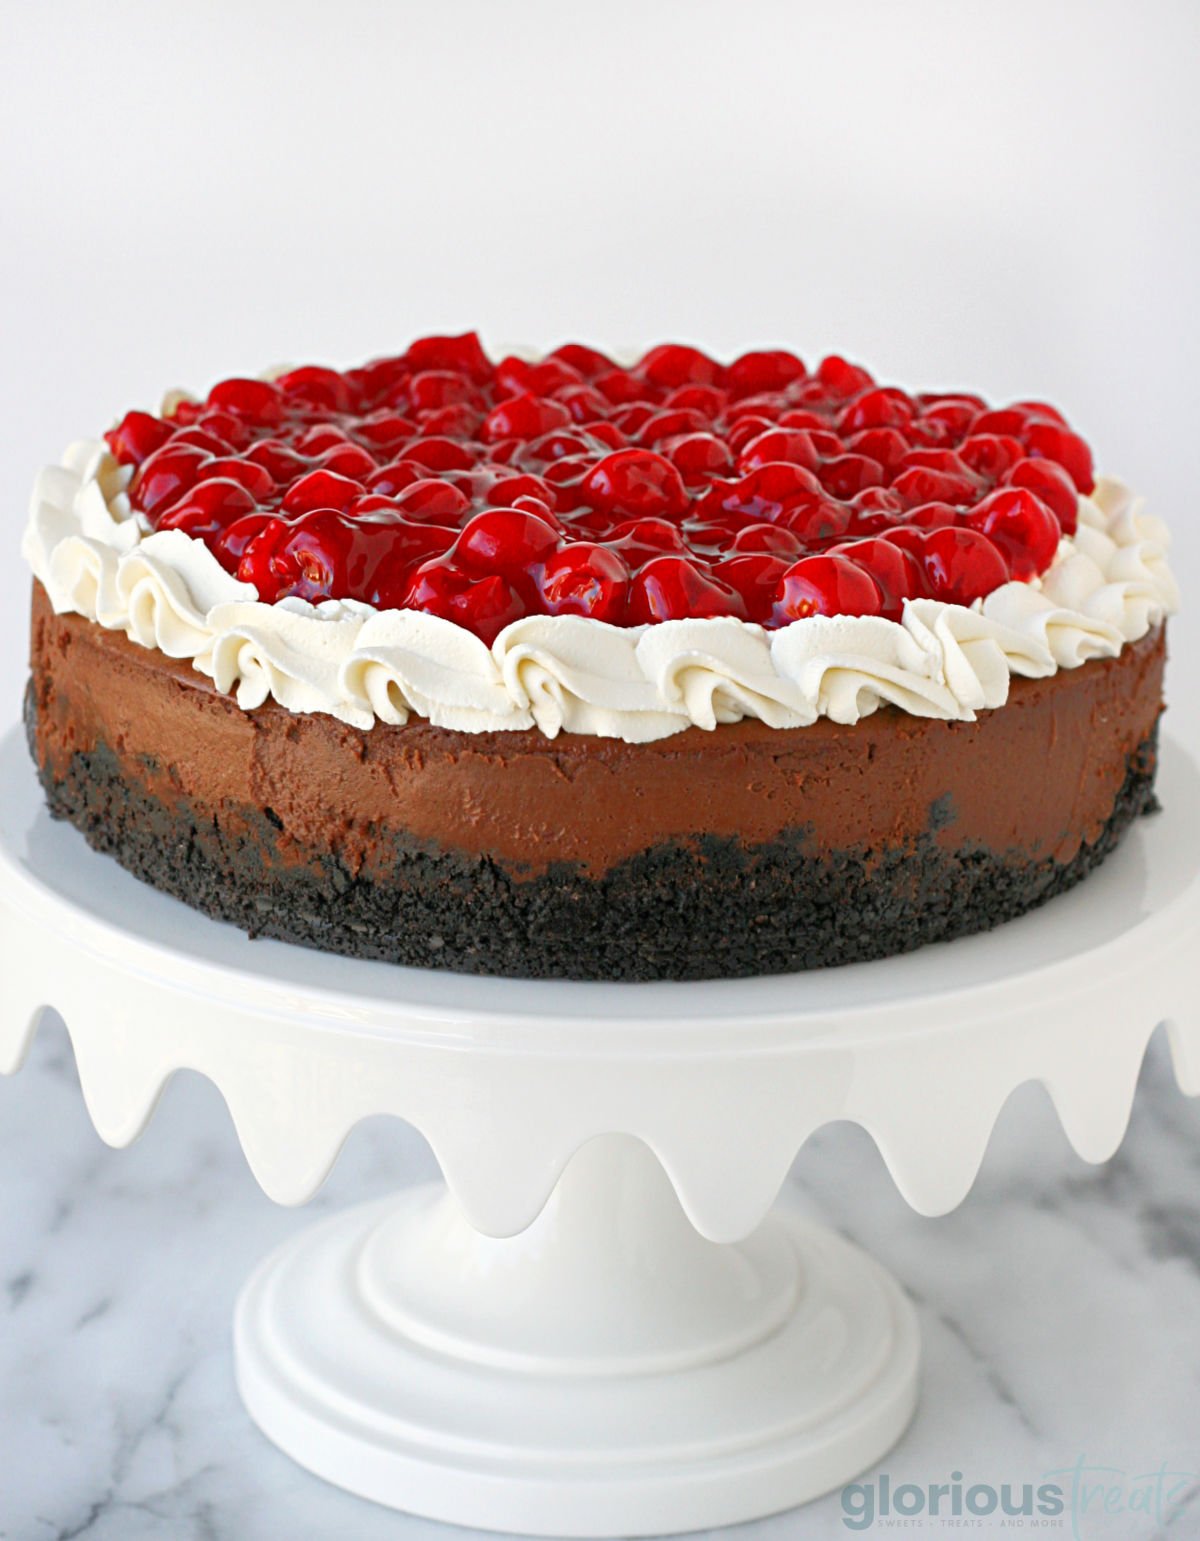
This gorgeous, decadent cheesecake is the perfect finish to any meal! Oh how I love an impressive dessert! This luscious Black Forest Cheesecake is just that… impressive! Rich, creamy chocolate cheesecake is topped with beautiful whipped cream and bright, sweet-tart cherries… it’s combination sure to bring rave reviews!
Really… just look at it!!
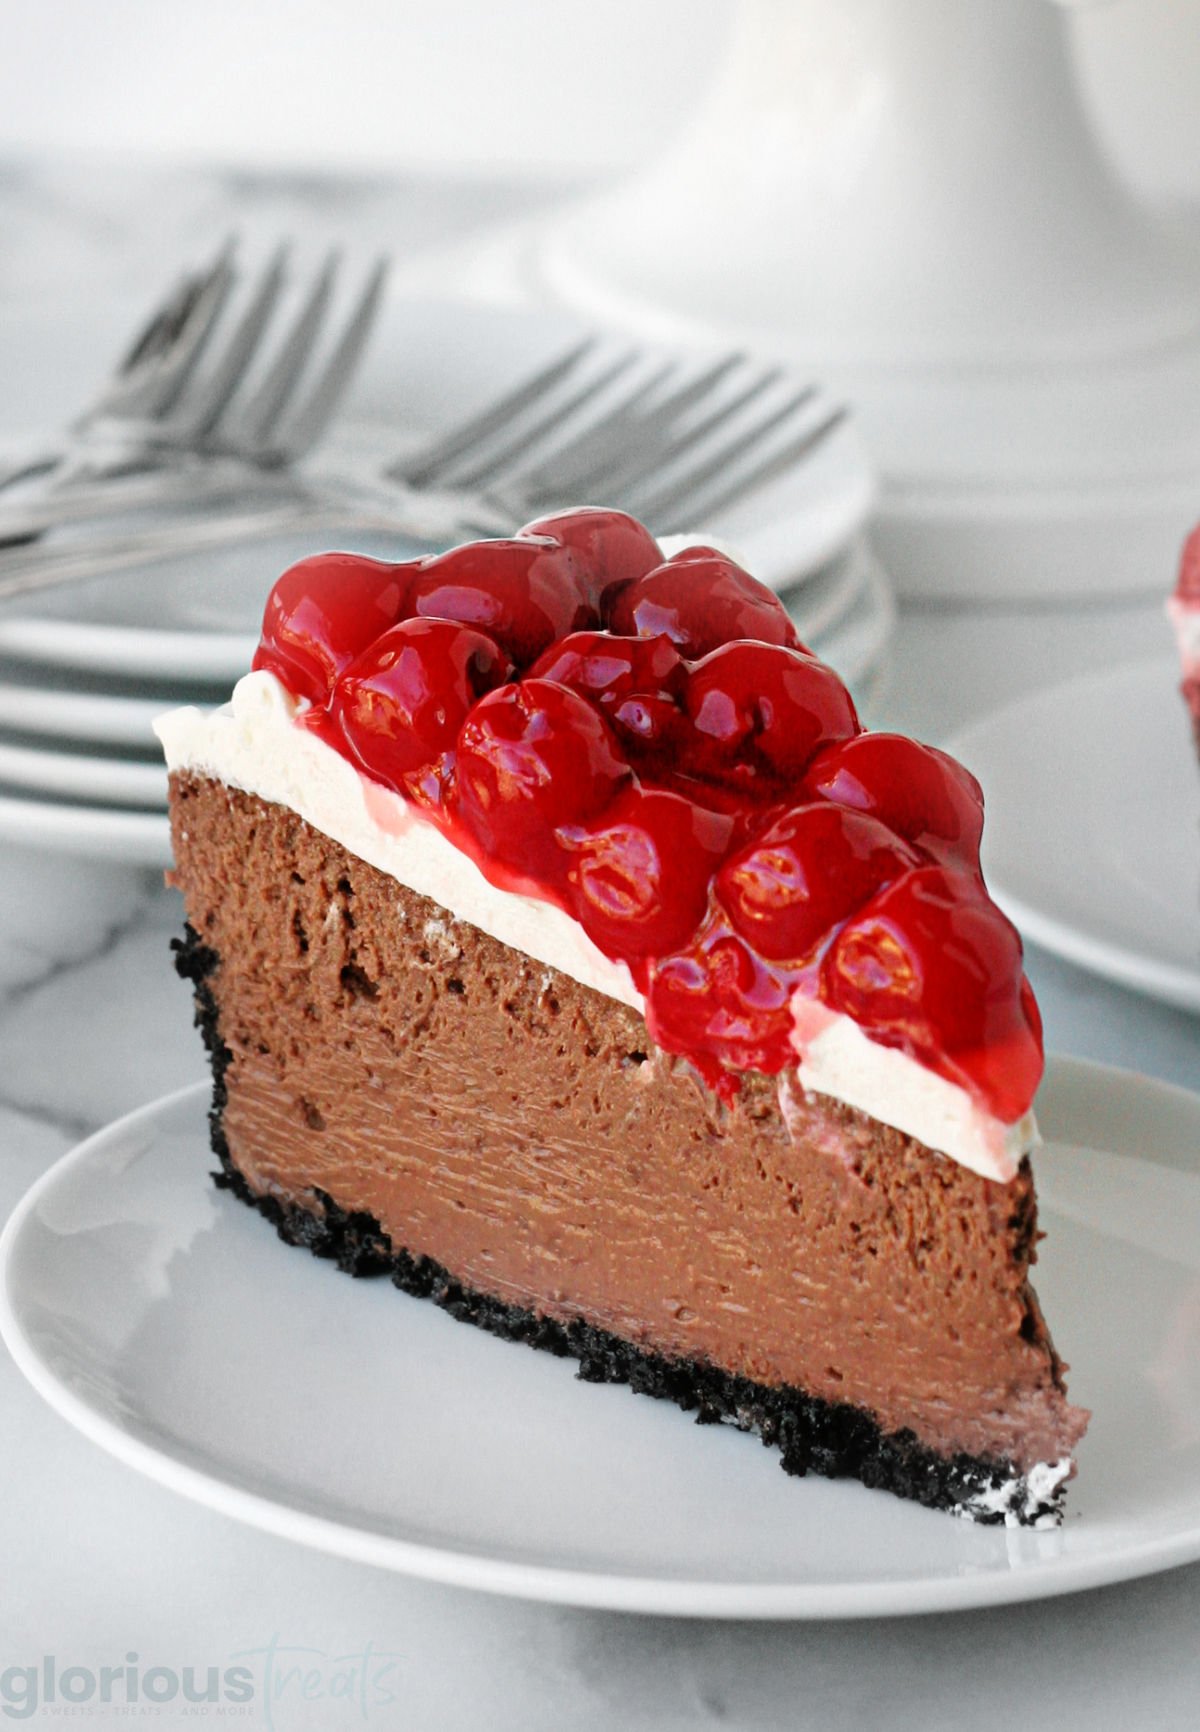
This mouthwatering fusion of a Black Forest cake and a classic cheesecake is so rich and decadent! Creamy, rich chocolate cheesecake sitting atop an Oreo crust all topped with freshly whipped cream and cherry pie filling.
The cream cheese perfectly balances the rich chocolate, while the sweet cherry pie topping adds an extra level of indulgence. And let’s not forget the Oreo crust – it’s the first taste you get, that crunchy chocolate goodness that makes the perfect base for the layers of deliciousness.
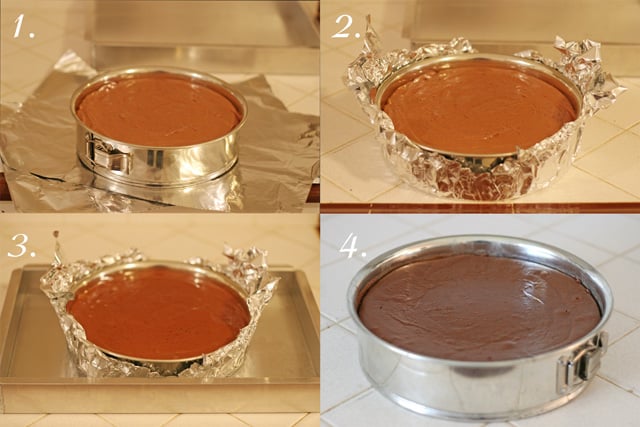
Water Bath
Baked cheesecake recipes often call for a “water-bath”. I’ll have to admit, as much as I enjoy complex desserts, I’ve had a mental block about the extra step of the water bath. Now that I’ve tried it, I’m not sure what I was worried about! This extra step really only takes a minute and the results are well worth it! My cheesecake baked up smooth, crack-free and the finished cheesecake was super creamy and delicious!
To create the water bath, (step 1-2) simply cover the cheesecake pan (sides and bottom) with foil so that no water will get into the pan (from the base seam of the springform pan). Place the whole pan in a large roasting pan or baking dish slightly larger than your cheesecake pan (step 3). Pour HOT water (I use hot tap water) into the roasting pan so that the water fills the pan about 1″ high. Bake as directed. Once baked, cool fully (as directed) and you will have a smooth, creamy, beautiful cheesecake (step 4)!
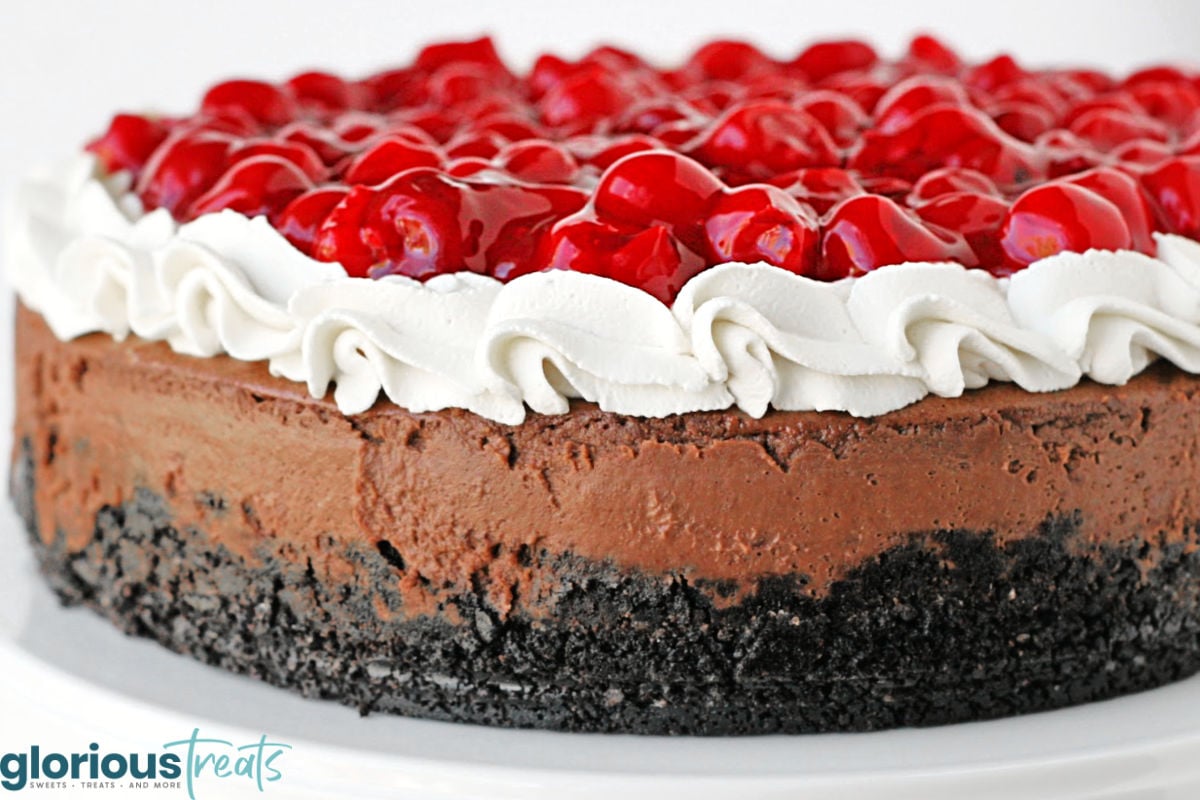
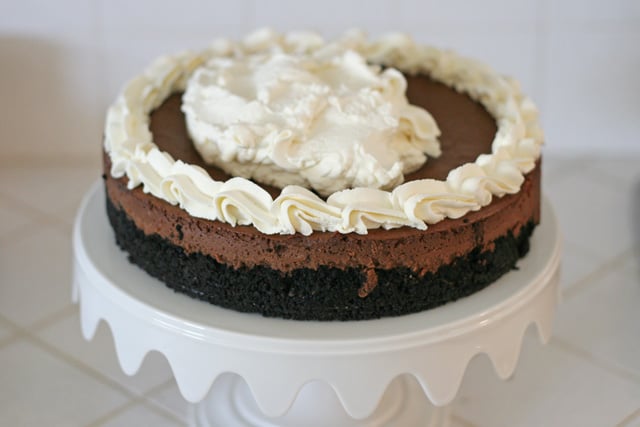
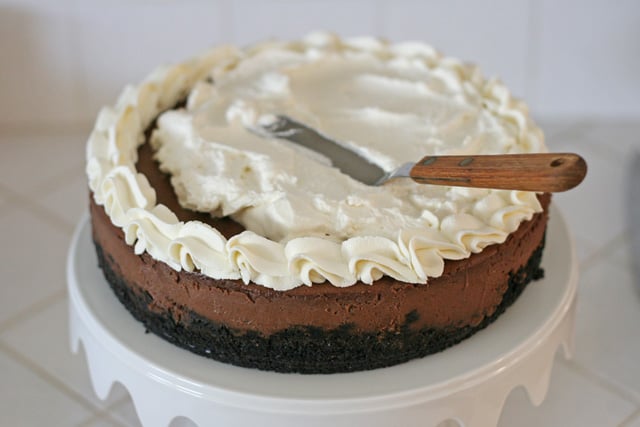
When the cheesecake has fully chilled (8 hours or overnight), mix up the whipped cream (listed in the recipe above). I put about 1/3 of the whipped cream in a pastry bag fitted with a 1M (Wilton) tip and made a pretty border. Scoop the remaining cream into the center of the cheesecake, then use an offset spatula to spread the cream to the edge (pictured below).
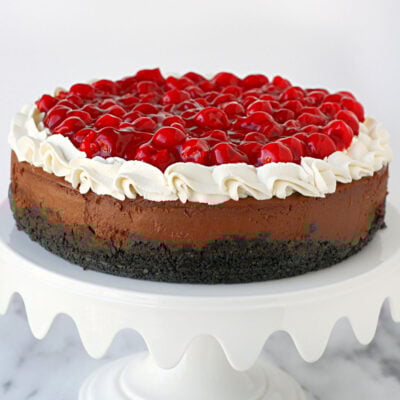
Top the whipped cream with a can of cherry pie filling (I always look for the “extra fruit” kind of filling). Keep the finished cheesecake in the refrigerator until ready to cut and serve.

This recipe does takes a bit of time to prepare, but I love that it can be made a day (or two) in advance, then kept in the fridge until you are ready to serve it.
More Decadent Chocolate Desserts
- Chewy Chocolate Chip Cookies
- Chocolate Pots de Creme
- Chocolate Chip Salted Caramel Tart
- Chocolate Cheesecake for Two
- Flourless Chocolate Cake
How to Make Black Forest Cheesecake
Black Forest Cheesecake
Ingredients
Crust
- 1 ½ cups crushed Oreos about 16 cookies
- 3 tablespoons salted butter
Filling
- 12 ounces semi-sweet chocolate chips 1 bag, high quality
- 24 ounces cream cheese room temperature
- 1 ¼ cups granulated sugar
- ¼ teaspoon salt
- ½ cup sour cream room temperature
- 2 teaspoons vanilla extract
- 3 eggs room temperature
Whipped Cream
- ¾ cup heavy cream
- ¼ cup powdered sugar
- ½ teaspoon vanilla extract
Topping
- 21 ounces cherry pie filling
Instructions
Prepare the crust
- Preheat oven to 375°F. Crush the cookies in a bag (no need to remove the filling), then place cookie crumbs in a bowl. Melt the butter in a small bowl, then pour butter over crumbs and stir until evenly moist. Dump mixture into the bottom of a 9" springform pan and press down firmly on the bottom and up the sides of the pan about 1". I use a measuring cup to press the crumbs up the sides, and around the bottom.
- Bake crust in pre-heated oven for 10 minutes.
Prepare the filling
- Pour chocolate chips into a bowl and microwave (at 50% power) until almost melted. Stir, until fully melted and smooth. Set aside.
- In the bowl of an electric mixer (using a paddle attachment), blend (room temperature) cream cheese until smooth.
- Add sugar and blend until fully incorporated.
- Add salt, sour cream and vanilla extract and continue to blend.
- Add melted (and cooled) chocolate and blend to combine.
- Crack eggs into a small bowl and blend together with a fork.
- Add eggs to the cheesecake mixture and blend on low speed just until combined. You do not want to beat the mixture too much after the eggs are added, or you will incorporate too much air- causing it to later puff up and deflate.
- Pour filling into baked crust.
- Reduce oven temperature to 300°F.
- To prepare water bath, wrap the cheesecake pan (bottom and sides) with foil, (you may need to criss cross two sheets of foil) so that no water can get into the pan. Place the foil wrapped cheesecake pan in a large roasting pan or baking dish, then pour HOT water into the roasting dish until the water is about 1″ deep. Carefully move to oven and bake.
- Bake cheesecake for 55-65 minutes, until the center barely jiggles when nudged.
- Cool cheesecake in oven for 1 hour then remove to counter and cool for another hour. Cover and move to the refrigerator and chill for 8 hours or overnight.
Prepare Whipped Cream
- Beat cream until it begins to thicken, add powdered sugar and vanilla, then continue to beat until thick and fluffy. Top chilled cheesecake with whipped cream
- Top whipped cream layer with cherry pie filling.
- Keep refrigerated until ready to serve. Cut with a sharp knife, and wipe off the knife with a moist/hot washcloth between cuts.
Made this last night oh my was it ever a hit!! It was so yummy and looked stunning! Thanks Glory. I did find my crust to be a little overdone and stuck to the pan as well, I think next time I will skip the prebaking or maybe only do it for five minutes as well using parchment paper. Nonetheless, no one seemed to care and just gave rave reviews! It was so good!
Looks amazing. I will have to try this. =)
It looks really amazing! Just mouth-watering! I also love to bake with Philadelphia 😉 I also have won a baking competition online once for it, so obviously I am also trying out your Philadelphia version 😀
take care 🙂 rebecca
Looks so yummy! How do you think this recipe would do if it was turned into minis? A little scared to commit to a full sized one! 🙂
Kristy, Yes, I’m sure it would work well as minis (and it’s on my to do list as well!). I would suggest dividing the (filling) recipe by thirds. You might also reference a previous mini cheesecake post of mine here, https://www.glorioustreats.com/kahlua-cheesecake/ It might be helpful for baking times, etc. Best of luck!
How do you remove the cake from the spring foam pan?? i find mines tend to stick to the bottom of it…. Please help…
thanks for the recipe need to try this soon,…
Hi Vishanna, I didn’t have any problem removing the crust from the bottom of the pan. Since the crust is baked first, it should be somewhat firm. I used a metal spatula to gently get under one edge of the pan, then work your way around and slide the whole cheesecake onto the platter of your choice. If you’re really worried, you could cut out a circle of parchment paper and put that at the bottom of the pan, then the baked cheesecake will slide off super easily.
I use parchment paper…after chilled comes out perfect!
Wow, that’s just gorgeous! I love philly,especially their chocolate cream cheese so this is definitely the one for me 🙂
WOW, this looks so good!!
This is one stunning cheesecake!
OMG this is SO flipping gorgeous!
I haven’t seen anything that looks this good on my computer screen in a long, long time! I think I am in LOVE!!